 Celebrate the season in your classroom with some festive Fall and Halloween crafts! Your little goblins will have a blast working on these fun projects.
Mummy Cups
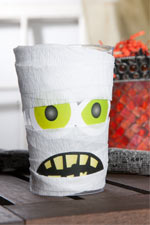
Are you planning a Halloween celebration in your classroom? Make these cute favor cups and fill them with mummy nummies!
Wrap white plastic cups with white crepe streamers. Attach with glue or tape, two-sided tape works great.
Download Mummy faces template, then print and cut them out to make your mummy cups come alive!
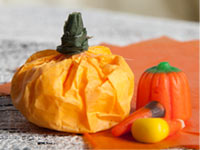
Another cute and easy party favor. Wrap some small Halloween goodies such as candy corn or orange jelly beans in orange tissue pomps.
Gather the corners together at the top and twist green floral tape to create a stem.
These make a super cute addition to your Halloween table!
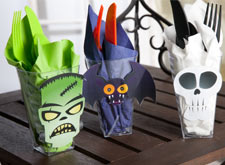
Start with square plastic tumblers.
Download the Utensil Cups template, print and cut out the cute faces.
Attach with tape or glue, two-sided tape works well.
Fill cups with coordinating napkins and utensils. Or use as treat cups and fill with goodies!
Festive Balloons
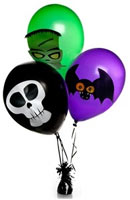
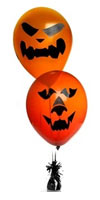
Start with solid color balloons.
Download these fun templates, print and cut out the faces. Attach with clear tape or two sided tape.
Halloween Wreaths
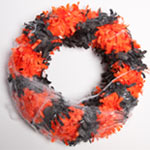
These adorable wreathes are fun & easy to make! You can decorate them with a variety of spooky items. Have kids work on them in teams to decorate your school or have each child make one to take home.
Materials:
- Plastic Plates – 10.25″ Dinner Plates work well
- Tissue Festooning- in one or two colors of your choice
- Decorations such as spider webs, plastic spiders, or other Halloween novelty
- Tape or glue
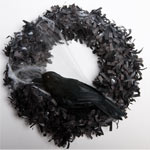 Start with two plastic plates, any color works, but you might want to coordinate the color with the color of the festooning.
Cut out the center of the plates, then glue the rim of the plates together, top sides facing each other.
Wrap the entire circle in festooning. If using two colors wrap each a few times then switch to achieve the look you want. Attach with tape or glue, two-sided tape works well.
Decoarate with fun accessories.
Download a printable version of these instructions with images:
How to make a Halloween Wreath
Thankful Turkeys
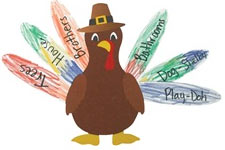
These adorable (and affordable) Thankful Turkeys are a fun craft for Thanksgiving. Each kit comes with supplies to make 12 Turkeys. Kids can write things they are thankful for on each feather. Get as creative as you dare. Use crayons, paint, markers, glitter, and other adornments to make these turkeys into works of art!

